If you’re looking to host your website on an Ubuntu server, cPanel is an excellent choice for web hosting. It provides an easy-to-use interface for managing your server and hosting your website. The best part? Installing cPanel on Ubuntu is a breeze!
This easy step-by-step guide will walk you through the process of installing cPanel on Ubuntu. Even if you’re a beginner, you’ll find that the installation process is straightforward and well-documented.
So, let’s get started with the system requirements for cPanel installation on Ubuntu.
System Requirements for cPanel Installation on Ubuntu
cPanel is a web hosting control panel that simplifies website and server management tasks. Before installing cPanel on Ubuntu, it’s important to ensure that your system meets the necessary hardware and software requirements. By doing so, you can avoid any potential issues that may arise during the installation process.
| Hardware Requirements | Software Requirements |
|---|---|
|
|
Note that these requirements are minimums, and it’s recommended to have higher specifications for optimal system performance. Additionally, it’s important to keep your system updated with the latest security patches and software updates to ensure smooth operation of cPanel.
Preparing the Ubuntu Server for installing cPanel on Ubuntu
Before installing, it is necessary to prepare the Ubuntu server for cPanel installation. Follow these steps:
-
- Update the server: Ensure the server is up to date with the latest packages and software patches by running the following command:
| Command | Description |
|---|---|
| sudo apt-get update | Updates the package list |
| sudo apt-get upgrade | Installs the latest package versions |
-
- Configure the hostname: A server hostname is a name that identifies a particular server. It is important to configure the hostname before installing cPanel. Run the following command:
| Command | Description |
|---|---|
| sudo hostnamectl set-hostname your.hostname.com | Configures the hostname |
-
- Set up the necessary repositories: cPanel requires certain repositories to be enabled for proper installation. Run the following command:
| Command | Description |
|---|---|
| sudo systemctl start firewalld | Starts the firewall service |
| sudo systemctl enable firewalld | Enables the firewall service to start at boot |
| sudo firewall-cmd –permanent –zone=public –add-port=80/tcp | Opens port 80 for web traffic |
| sudo firewall-cmd –permanent –zone=public –add-port=443/tcp | Opens port 443 for SSL traffic |
| sudo firewall-cmd –reload | Reloads the firewall configuration |
After completing the above steps, the Ubuntu server is now ready for cPanel installation.
Installing cPanel on Ubuntu

Before proceeding with the installation process, ensure that your Ubuntu server meets the minimum system requirements. Refer to Section 2: System Requirements for cPanel Installation on Ubuntu for more information.
Here are the steps to follow for installing cPanel on Ubuntu:
-
- Download the installation script by running the following command:
curl -o latest -L https://securedownloads.cpanel.net/latest
This will download the latest version of the installation script.
-
- Make the downloaded installation script executable by running:
chmod +x latest
This will allow the script to be executed.
-
- Run the installation script by executing the following command:
./latest
This will begin the installation process. The script will take care of downloading and installing the necessary packages and dependencies.
-
- Once the installation is complete, access the cPanel installation wizard by navigating to:
https://your-server-ip:2087/
Replace your-server-ip with the IP address of your server. The wizard will guide you through the process of configuring cPanel and setting up your hosting environment.
Congratulations! You have successfully installed cPanel on Ubuntu. For information on how to configure and manage cPanel on Ubuntu, refer to Sections 5 and 6.

Configuring cPanel on Ubuntu
After successfully installing cPanel on Ubuntu, it’s time to configure the settings for optimal performance. Below are the steps to configure cPanel on Ubuntu:
Setting up Root Password
After installation, it is recommended to set up a root password for cPanel. This can be done by accessing the Terminal and entering the following command:
passwd
You will then be prompted to enter and confirm your new password. Make sure to choose a secure password and store it in a safe place.
Configuring Firewall
It’s important to configure the firewall for security purposes. You can do this by accessing the Terminal and entering the following command:
sudo ufw enable
This command will enable the built-in firewall for Ubuntu. You can then allow traffic for cPanel by entering the following command:
sudo ufw allow 2082/tcp
This command allows traffic on port 2082, which is used for cPanel access.
Securing cPanel
Securing cPanel is essential for protecting your server from malicious attacks. You can do this by implementing the following security measures:
- Enabling Two-Factor Authentication: This adds an extra layer of security to your cPanel account by requiring a code in addition to your password for login.
- Disabling Anonymous FTP: This prevents unauthorized access to your server via FTP.
- Installing an SSL Certificate: This encrypts website traffic and ensures secure communication between the server and clients.
Implementing these security measures will help keep your cPanel installation on Ubuntu secure and protected.
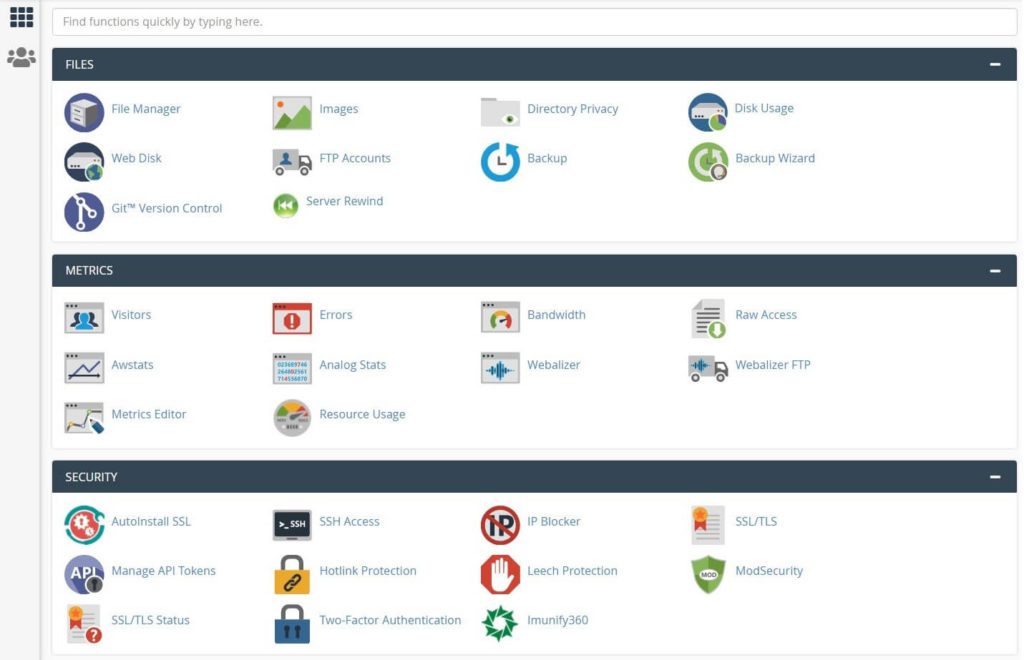
Accessing and Managing cPanel on Ubuntu
Once cPanel is successfully installed on Ubuntu, users can access it via a web browser. Simply open the browser and enter the server’s IP address followed by the port number for cPanel (2083). For example, if the server’s IP address is 123.45.67.89, enter “https://123.45.67.89:2083” in the browser address bar.
Upon entering the correct credentials, users will be directed to the cPanel dashboard. From here, users can access a variety of tools and features to manage their website and hosting settings.
One essential task for cPanel users is to set up and manage user accounts. To create a new account, go to the “Account Functions” section and click “Create a New Account.” Users can then enter the necessary information, including domain name, username, and password.
Aside from user account management, cPanel offers a range of administrative tools for managing website files, databases, email accounts, and other hosting settings. Users can also install and manage various third-party applications via cPanel’s “Softaculous” tool.
Overall, cPanel provides a user-friendly and comprehensive interface for managing website hosting on Ubuntu servers. With its wide range of features and tools, cPanel is an essential tool for any website owner or administrator.
Troubleshooting common issues during cPanel installation on Ubuntu
Even though the installation process is straightforward, there are some common issues that may arise when installing cPanel on Ubuntu. Here are some troubleshooting tips to help you resolve any issues:
1. Network Issues
If you encounter any network-related issues during the installation process, ensure that your Ubuntu server is connected to the internet and that the correct networking configuration is set up. You can check your network connectivity using the ping command.

If you are using a firewall on your Ubuntu server, ensure that the necessary ports are open to allow communication with cPanel and its services.
2. Installation Errors
If you encounter an error during the installation process, the first step is to check the installation log file. The log file contains detailed information about the installation process and can help you identify the cause of any installation errors.
If the error is related to a missing dependency, you can use the apt-get command to install the necessary dependencies.
3. Licensing Issues
If you encounter any licensing issues during the installation process, ensure that your cPanel license is valid and active. You can check your license status by logging into your cPanel account and reviewing your license information.
4. Access Issues
If you are unable to access cPanel after installation, ensure that you have entered the correct URL in your web browser. You should use the IP address or hostname of your Ubuntu server followed by “/cpanel” to access cPanel.
If you are still unable to access cPanel, check your firewall configuration to ensure that the necessary ports are open for cPanel and its services.
Remember to always backup your server before performing any major changes or updates. This will ensure that you can recover your data in case anything goes wrong during the installation process.
Conclusion
Installing cPanel on Ubuntu can seem like a daunting task, but with the easy step-by-step guide provided in this article, it is a seamless process. By meeting the system requirements, preparing the Ubuntu server, and following the installation and configuration steps, web hosting with cPanel is made effortless.
Readers are encouraged to refer back to this article for troubleshooting tips and solutions to common issues that may arise during the installation process. With cPanel on Ubuntu, accessing and managing a website has never been easier.